Configure VMware Horizon View Direct-Connection Agent for Linux
Silently, few days ago VMware has released View Agent Direct-Connection for Linux. In this blog post I will demonstrate how to install and configure VADC agent on Ubuntu Desktop VM.
View Agent Direct-Connection for Windows is available for very long time. Basically it allows direct access to remote Windows PC which has Horizon View Agent installed. It utilize dedicated protocol called VMware Blast which is optimized for transmitting high quality audio and video.
Great thing about VADC is that it doesn’t require dedicated Horizon Connection Server, which means it doesn’t require any VMware license to leverage this feature. Instead View Connection Server in Horizon View CLient, you specify VM IP addres and provide user credentials to directly connect with your remote system.
Until now VADC was available for Windows only. This has been changed and few days ago as VMware has released dedicated VADC agent for Linux as well.
Do not miss Horizon View Agent for Linux with VADC for Linux. Horizon View Agent for Linux is available since some time, but to connect with your Linux VM you had to use Horizon Connection Server with dedicated Linux Pool created first.
This is not the case anymore with new VADC for Linux.
VADC for Linux - Supported Platforms
At the time of writing fallowing Linux versions are supported by VMware:
| Linux Distribution | Architecture |
|---|---|
| Ubuntu | 20.04 and 18.04 x64 |
| Red Hat Enterprise Linux (RHEL) Workstation | 7.2, 7.3, 7.4, 7.5, 7.6, 7.7, 7.8, 7.9, 8.0, 8.1, 8.2, and 8.3 x64 |
| Red Hat Enterprise Linux (RHEL) Server | 7.8, 7.9, 8.2, and 8.3 x64 |
| CentOS | 7.2, 7.3, 7.4, 7.5, 7.6, 7.7, 7.8, 7.9, 8.0, 8.1, 8.2, and 8.3 x64 |
| SUSE Linux Enterprise Desktop (SLED) | 12 SP3, 15 SP1, and 15 SP2 x64 |
| SUSE Linux Enterprise Server (SLES) | 12 SP3, 12 SP5, 15 SP1, and 15 SP2 x64 |
Personally I have tried some non-supported version, like Xubuntu 21.10 and it didn’t worked. During agent installation I did get a prompt that audio is not supported on this particular version, anyhow installation has been completed successfully. Then when everything was setup correctly I was able to establish remote session with VM. Unfortunately after providing password directly on VM, Horizon Client exited and session was closed.
Initially thought that this was caused by unsupported Ubuntu version so tried the same with Xubuntu 20.04.3. I didn’t had any issues with installing both Horizon agents and didn’t get the prompt about missing audio. Unfortunately after login into VM, same as previously, Horizon View Client exited unexpectedly.
I think that with some additional effort we could force non-supported Linux distributions to work but honestly didn’t had enough time to search for the solution.
I have rather focused on Ubuntu Desktop 20.04 which is officially supported by VMware.
For more info about system requirements and configuration go to Official VMware Documentation site
Ubuntu 20.04.3 Installation
Download Ubuntu Desktop 20.04.3 iso file from Ubuntu website and perform regular OS installation on your virtualization platform.
Once installed configure static IP for your VM, if you have DHCP configured in your environment, VM should pickup IP address automatically.
By default Ubuntu Desktop does not come with installed Open SSH server. To install SSH server and establish secure connection through terminal run fallowing:
|
|
Once completed you should be able to login into VM terminal through SSH client like Putty.
Then paste fallowing command into terminal to install necessary packages required by Horizon View Agent for Linux:
|
|
Obtaining VMware Horizon View Agent for linux
First we have to obtain VMware Horizon View agent for Linux and Horizon View Agent Direct-Connection for Linux.
This will require VMware account. If you don’t have valid VMware subscription, create one and request Horizon View trial from Customer portal. This will give you access to required files.
Required files are accessible only when Horizon 2111 version will be selected, previous Horizon versions does not have VADC for Linux.
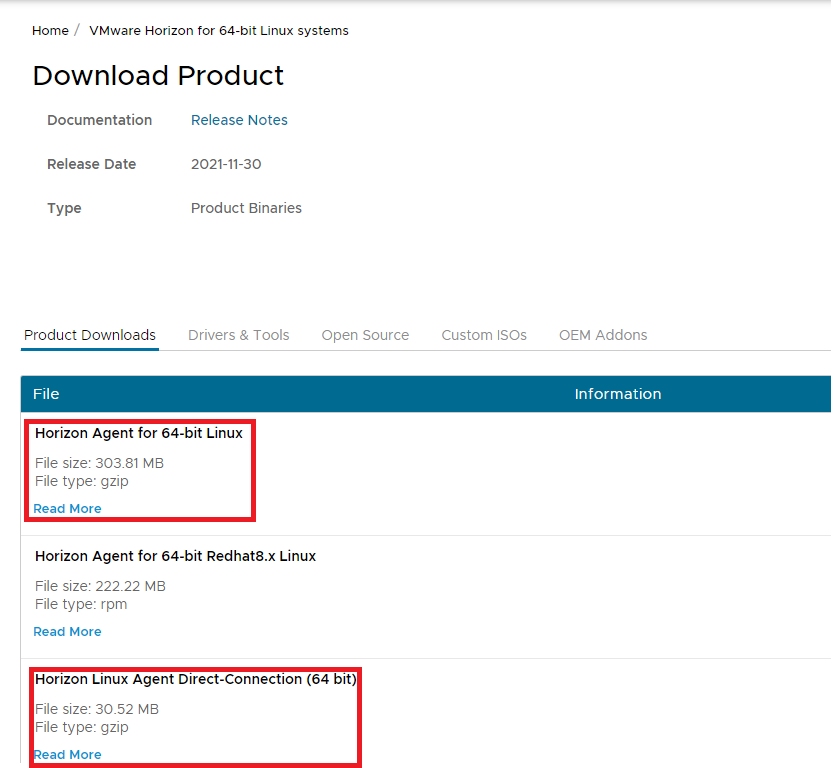
We need to download fallowing two files:
- Horizon Agent for 64-bit Linux
- Horizon Linux Agent Direct-Connection (64 bit)

Figure I: VMware download portal to obtain Horizon View Agent for Linux
As you can see Horizon Linux Agent Direct-Connection has been released on 16th of December 2021, so it’s very fresh.

After download you should have two files downloaded:
- VMware-horizonagent-linux-x86_64-2111.1-8.4.0-19066680.tar.gz, which is Horizon Agent for Linux
- VMware-horizonagent-linux-vadc-x86_64-2111.1-8.4.0-19066680.tar.gz, which is Horizon Agent Direct-Connection for Linux
Installing VMware Horizon View Agent for Linux
Copy both files into /tmp directory on your Ubuntu box using WinSCP.
- Unpack Horizon Agent for Linux:
|
|
- Once unpacked go to directory which has been created:
|
|
- Install agent running fallowing command:
|
|
Applied switches performsw audio installation (-a yes) and skipps Single Sign-On installation (-S no).
- Accept VMware EULA and hit “Enter”
- Once installed you should get fallowing prompt:
|
|
Installing Horizon Agent Direct-Connection for Linux
Once Horizon View Agent for Linux has been installed, we need to install Horizon Agent Direct-Connection for Linux next.
- Go to upper directory and unpack second archive:
|
|
- Once unpacked go to directory which contain unpacked VADC directory:
|
|
- Install VADC agent running fallowing command:
|
|
- Accept VMware EULA and hit “Enter”
- You should get an error prompt saying that nginx is not installed:
|
|
- Install Nginx:
|
|
- Repeat VDAC agent installation and accept VMware EULA:
|
|
- You should get fallowing output on your console:
|
|
Adding user to vmwvadc group
Last step that needs to be done is to add local user account to vmwvadc group that has been created during VADC installation.
Without this step we would get “Authentication Failed, you are not entitled to use the system” error in Horizon View Client
In my case the user account I want to add is named “dan”:
|
|
Install Horizon View Client
To verify if connection works fine we need to install Horizon View Client on our Windows machine.
You can download installation file from VMware portal, like previously with agent files, or you can use chocolatey to install it. Assuming your machine has a chocolatey installed run fallowing command:
|
|
Once completed your source Windows machine should have Horizon View Client installed.
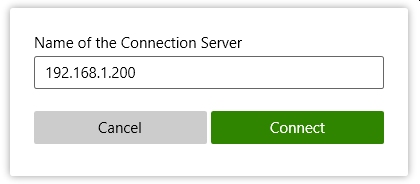
Open it and click “+” to add new connection server. In this case provide IP address of your Linux machine:

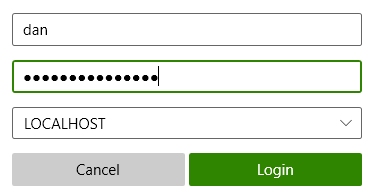
Once defined double click on newly added server and you will be prompted for username and password:

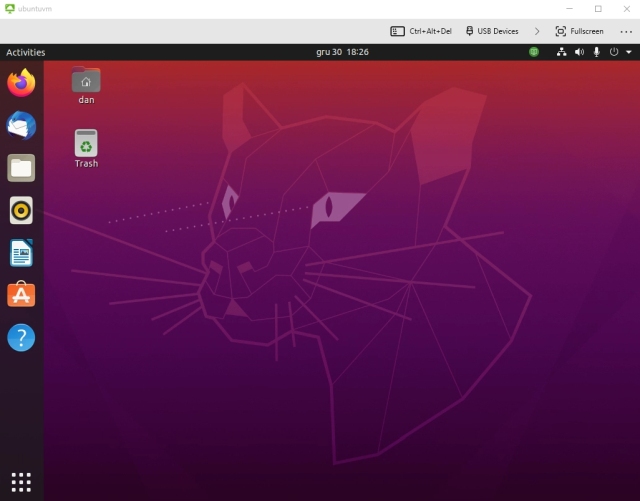
If everything goes well you should be prompted with user name and password. Once provided you should see fallowing screen:

Summary
I use Horizon View Agent Direct-Connection on daily basis and I think it’s extremely useful, especially now when Linux is also supported.
Many people struggle to connect with Linux GUI remotely and this solution provide efficient and fast way to do it.
Since VMware Blast is utilized, audio and video on Linux machine works really smooth.
Printers, audio devices or folders from our source machine can be automatically mapped to Linux VM which can be very convenient for day to day operations.
Thanks for reading.
